Overview
The Maine Memory Network has a feature called an album. The Album Tool allows you to collect and annotate your favorite items from MMN into one place. You can have as many albums as you want and they are a great way to organize and go back to your favorite images. It is easy to save items in an Album for later use, add your own text, email an album, or make an album into an online slideshow, and you can create as many albums as you want.
Albums can be especially useful for:
- Educators to save collections of historical source documents for classroom use
- Students to create online school projects
- You to email collections of images to friends and family
- You to save historical items that you want to refer to frequently
- Historians to collaborate on projects that require historical images
Login First
First you must create an online account to access the Album function so we can save your changes for you. If you do not yet have a free account, you can sign up for a free account.
When you login, then your name will appear on the upper right hand corner of the website. Click here for help with logging in or registering for a free account.
The My Album Toolbar
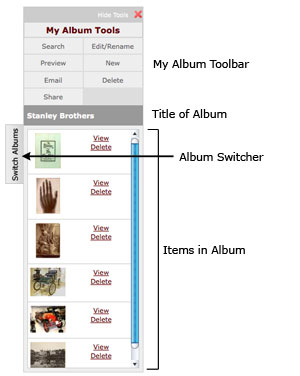
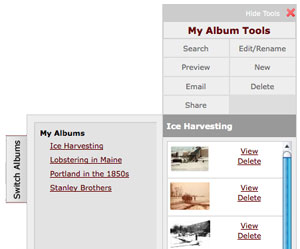
After you have logged in, the My Album toolbar should appear on the right side of your screen. Note the eight buttons at the top of the My Album toolbar that let you Search for items, Edit/Rename the album, Preview the album, Create a New album, Email an album, and Delete an album. You can also hide the album tool by clicking on the red X in the top right corner.
If you hide the My Album column, you can always display it again by clicking on the Show Album link at the top right of the page.
Creating a New Album
In order to create a new album, simply click on New in the My Album Tools. Be sure you're logged in, and that your album is showing.
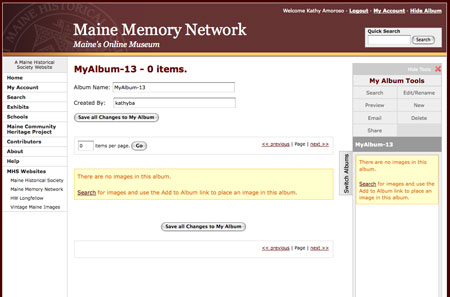
In the grey bar above the album space, you should see "MyAlbum 1."In the center of your screen, you will also see "MyAlbum 1" and "0 items."At this point, you album is empty.
Adding Items to Your Album
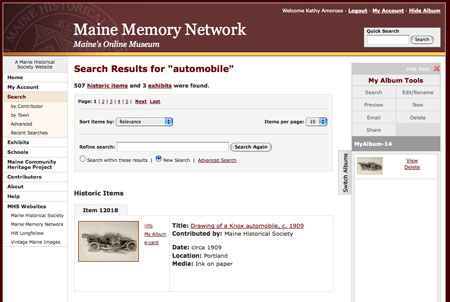
To add items to your album, you must locate an item first. Click on "Search" in the My Album toolbar or use the quick search at the top of the page. (Go to Search Tips to get help with searching for items.)
After your item appears in the search results, click on the "My Album" link to the right of the image. The page will refresh and the item will appear in the My Album column on the right side of your screen.
Continue adding items in this way. You can come back to this album later and add more items, if you choose.
The "My Album" link will accompany most thumbnails on the site, allowing you to add an item to your album anytime you see it. If you see a thumbnail for an item without the "My Album" link, you can always click on the thumbnail or the "info" link to go to the individual item page, where you can find the "My Album" link.
Additionally, from Lesson Plans, Document Packets, and other areas of the site where collections of images are presented, you can click on the "Add all items to My Album" link, and a new album will be automatically created in your account, filled with all the items in that collection.
Deleting Items from an Album
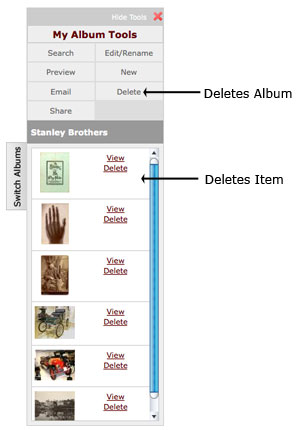
You can delete items from your album by clicking on the "delete" link next to the item in the album column. Please note that clicking on the "delete" link in the album toolbar will delete the entire album. If you want to delete an item, make sure you use the Delete link next to the item.
Getting More Information on Items in your Album
You can get more information about the items in your album by clicking on the thumbnail image of any item in the My Album column. This will take you to the individual item page where you can read a description, catalog record, and other information about that item.
Naming or Renaming an Album
Before performing other editing tasks, you should to give your album a name. This name should be kept short and clear.
Click on "Edit/Rename" in the My Album Tools in the right column. The page will refresh to the Edit My Album Page.
In the input box at the top of the content area, you can remove the existing name (e.g. "MyAlbum-1") and type in a name for your album.
Be sure to click the "save all" link or the "Save all Changes to My Album" button before leaving this page, otherwise your changes will not be saved.
Editing an Album
To add text or rearrange the images in your album, click on "Edit/Rename" in the My Album tools.
The page will refresh to the Edit page. You can perform all album editing functions on this page, including changing the order of the items and adding and editing your own text.
Be sure to click the "save all" link or the "Save all Changes to My Album" button before leaving this page, otherwise your changes will not be saved.
Changing the Order of Items in an Album
To rearrange the order of the items in your album, you have two options, moving an item one position at a time, or re-numbering the order of all items in an album.
Clicking the "up" or "down" link next to a thumbnail will move that item one position at a time.
To renumber the entire album, simply change the numbers in the small boxes to the right of the thumbnails then click "save all."
These numbers do not have to be consecutive. You can assign order numbers like "10," "20," "30," "40," and so forth. The advantage of numbering in this way is that you can later place items in between these numbers without having to renumber all the items.
When you click the "save all" link or the "Save all Changes to My Album" button, the page will refresh with your items organized in the order you have chosen. It will not change the numbers you have entered. If you accidentally give two items the same number, the one you added to the album first will appear before the other one in your album, but they will both retain the number you entered.
Adding and Editing Your Own Text in an Album
You can add your own text to every item in your album. Type the desired text into the "Text" input box to the right of each item. When you have finished adding text to all the items, or before you leave this page, click the "save all" link or the "Save all Changes to My Album" button to save the text. Any of these links or buttons will save all changes you have made in all the input boxes.
The album will not recognize indentations (tabs or spaces). To create paragraphs, hit the "enter" or "return" key twice. This will leave a space between paragraphs.
We discourage the inclusion of HTML code in the myText input boxes. Some code may not work.

Previewing your Album
To see your online slideshow, click on the on "Preview" link in the My Album toolbar.
The album will be displayed in slideshow view, by default, which lets you view one item at a time with your text, in the order you have chosen. While viewing as a slideshow, click "next" to see the next image. You can also click "previous" to see the last image viewed, or "start" and "end" to go the beginning or end of the slideshow.
The other view option, as a list, is especially useful for printing an album, as it allows you to view all the items in your album with your text on a single page. To access this, click "List View" from the View Options area at the top of the slideshow.
Adding or Linking to your Album from your Website
The best way to receive the URL for your slideshow view is by emailing it to yourself. You will receive an email with the Website address of your slideshow. You can copy this URL into the code on your Website.
Emailing an Album
Be sure you're logged in, and that your album is showing, then click on the on "Email" link in the My Album toolbar at the right of the page.
You can email your album to a friend, teacher, or colleague by filling in the appropriate fields and clicking the "Send My Album" button at the bottom of the page.
If you want the recipient to be able to edit your album, check the box labeled "Allow recipient to edit My Album." If the box is unchecked, the recipient will not be able to make changes.
Switching Between Albums
Be sure you're logged in, and that your album is showing.
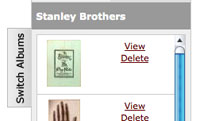
If you have more than one album, you can work with a different album by clicking on the Switch Albums tab on the left side of the album. A small box will slide open and your albums will be displayed.
From the list you can select the one you want to use.
You can also view a list of all your albums by clicking on "My Account" in the left navigation bar, then on "My Album list" below it. When you click on any album name that appears in the My Album list, your right column will switch to that album.
It is important to remember that any items you add to an album, or other changes you make, will only affect the album showing at the right of the page, not any of your other albums in your account. If you want to add items or edit another album, you must switch to that album first.
Deleting An Album
Click the "Delete" button in the "My Album" toolbar. This will delete the album that is visible on the right column. You will be asked to confirm that you want to delete the album.
Hiding and Showing your Album
If you do not want the album to appear on the right side of the page while you're logged in, click the X next to "Hide Tools" at the top of the "My Album" toolbar or on the "Hide Album" link at the top right of the Website.
Hiding the album is helpful for people with small monitors or for Contributing Partners working on the administration areas of the website.
When you want the album to reappear on the right, click on the "Show Album" link at the very top right of the screen.
Getting More Help
If you require more assistance or are a teacher and want to request a demonstration, please contact us.